An interview with a beginner like you
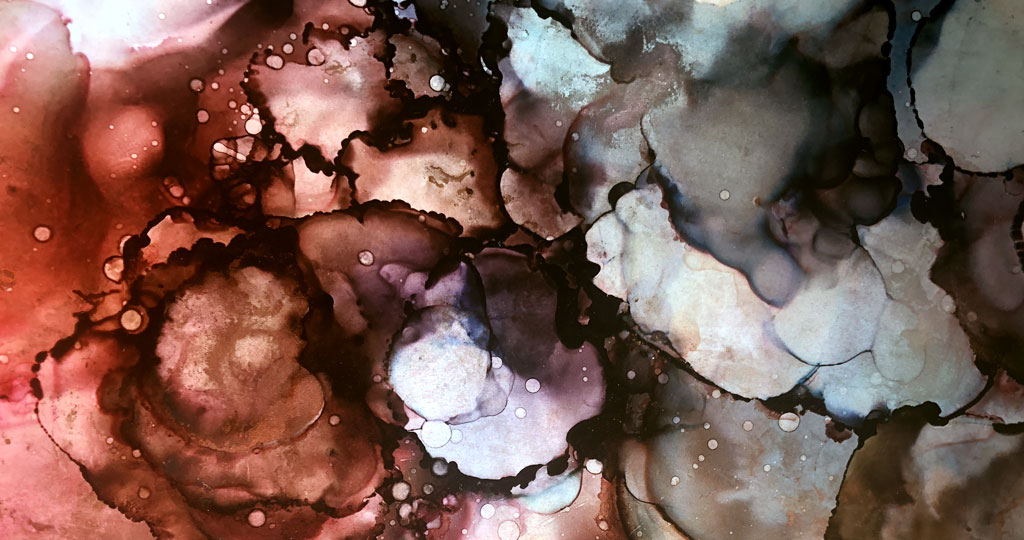
It wasn’t until I used alcohol inks for the first time that I suddenly recalled all the side-comments made about ‘brown’ from many of the Alcohol Ink YouTube videos. I was sitting at my art table (our tiny dining table) when I put my Tim Holtz Alcohol Inks and Isopropyl Alcohol down onto the Yupo. One too many colours at once and before I knew it I was staring at a brown muddy mess, and in a panic about what to do.
But as a result of watching those same YouTube videos as you, I also had Tim Holtz’s encouraging sentiment in my head, which was to ‘embrace brown.’ So I continued on…
It was an alcohol ink baptism – so many hard and fast realisations and learning! As I continued with it, I saw the artwork transform so many times. Then came the question, do I leave it or keep going? By the end, I didn’t hate it, it wasn’t a complete disaster! It was my first piece, not a masterpiece and I’d given time to making, which meant more.
Each work since then has taught me something new and different so I thought I’d write them down in case they were helpful to anyone else. But ultimately, don’t let a brown muddy mess be the reason you stop trying. You have more to give that artwork and you are more than capable. Accept it and push on.
Alcohol ink tips for beginners
Watch Tim Holtz’s videos
Include Tim Holtz as part of your alcohol ink journey and you will be all the better for it!
Tim is an artist, a maker and a creator, who is so gracious with his time and sharing of knowledge. He will help you to learn how to use alcohol inks via his video tutorials (Facebook lives) or demonstration videos from Creativation. They are encouraging and detailed due to his acute level of observation and empathy for those learning.
Check out his blog that features an extensive video catalogue, and be prepared to take notes!
Use Isopropyl Alcohol (IPA) > 91%
A percentage for IPA refers to a purity grade, anything less than 100% contains purified water. I found the evaporation rate for 91% or 100% versus 70% to be much better in achieving effects in my painting. When using 70% I noticed I would lose effects that I liked when the solvent took longer it took to evaporate.
Limit your palette
If you put too many alcohol inks on straight away then you do risk creating a brown muddy puddle, which is hard to make interesting. Try instead to start with one colour to make a monochrome piece. This will help to give you an idea of how alcohol inks and or isopropyl alcohol move and work together on a surface.
Using one alcohol ink at a time can help you realise how cool they each can be – revealing different shades or pigments – you can be surprised at what appears!
Next, try picking 2-3 colours and working them one at a time or both together. Check out our range of swatches to help plan your colours stories!
Narrow your focus
Work in one area of the surface at one time. If you throw too much on at once with isopropyl in all corners, too much will be happening at once. You will be picking up the surface and tilting it like two sugar-high kids on a see-saw.
Be patient
Allow drying time. It doesn’t take long for alcohol inks to dry (7-10secs) but when mixed with isopropyl alcohol they have a little bit more time to work. Try an airbrush tool or a hairdryer to help speed up the drying if you need. Layering alcohol inks can be very beautiful so it’s worth being patient.
Create depth
Apply isopropyl alcohol using a pipette, a fine-tip applicator, a spray bottle or a splatter brush. Each tool can help to create different drop or splatter effects. The placement or direction in which they were applied can be important too (e.g. angle the fine-tip from the side to create momentum leading into the colours or across the ink).
Be conscious about lighting
We can get so engrossed in our work that time can just slip by, and this can change the lighting situation on our artwork. Aim to work in a space that has lots of natural light. If it is not adequately lit, your artwork could look very different.
If you don’t have the option to work in a naturally lit room, then work on the art piece bit by bit, taking it into different rooms to see how it might change. This will help prevent you from going too far in one direction if that wasn’t your intent.
Try it in a frame or under picture mount board
You might not see the beauty at first. It takes a bit to practice seeing an eye for the composition but to help, try placing your work in a frame. The picture mount or a frame create separation for the eye between the artwork and wall, which can change the perception completely. This is something that is hard to imagine when it was resting on your table.
Mix up a palette on your craft/mixed media mat
Put alcohol inks directly onto the craft mat together with some isopropyl alcohol and then mop up it up with some synthetic paper. Swipe multiple times then flip it over to see what patterns you created. You can also try stamping to pieces of yupo together and peeling them apart. As Tim Holtz says, it is all about the dismount.
Stand & paint
Standing at a desk while you work can help give a different perspective. Sometimes sitting at a desk, we can be too close.
Step Away
You don’t need to keep working at your piece non-stop, you can easily stop playing with it and rework it another time when you reactivate the alcohol inks with blending solution or isopropyl alcohol. Knowing when to stop is difficult but it is good to step away now and then.
Leave the piece out so you can walk past it and see it from different angles. Try turning it around on occasion, you might suddenly like it better upside down or you might see a particular area you want to change. A fresh head helps, don’t keep reworking it if you are getting frustrated.
Let it go
There is no right/wrong with alcohol inks. Brown is pretty! Embrace it and carry on. Give yourself time and let go of any expectations. Enjoy the peace and fun the activity can provide.
Experiment & Explore
There are different ways to apply the inks to your surface – it doesn’t have to be shaken onto a page and blown around. You can use a paintbrush, scrunched up glad wrap, a felt stamp, another piece of Yupo to smear the colours across the surface. Or instead of synthetic paper, it can be on tile, vinyl hardcore, curred resin, primed canvas…
Hope these alcohol ink tips for beginners can help in some way – would love to hear of yours!